Vocabulary Focus
seed, sprout, plant, vine, pumpkin flower, green pumpkin, orange pumpkin, pumpkin patch, jack-o-lantern, and pumpkin pie.
I also focused on the idea of each item "growing" or "changing" into the next stage of the cycle.
For this unit each day we made a stage of the pumpkin life cycle.
Day One
I hung "dirt" on the board. This was brown paper :) I read aloud a pumpkin story. There are so many good ones out there. I picked "It's Pumpkin Time" by Zoe Hall to read to my kiddos. After reading the story, I introduced the vocabulary words/cards and the kiddos put the cards in the correct order. We talked about what comes first. The seed! So of course we made seeds!!
I cut ovals from the largest creative memory oval cutter using the blue blade. This gave me the biggest oval possible. I cut 2 per student. Then I used the hole punch and punched holes around the pair. Last, tying a brown string on the first hole so the kiddos could practice their lacing skills. After the kiddos laced, they crumbled 2 pieces of scrap paper to stuff the seeds. The last thing to do is to plant the seeds of course!! Each kiddo came up and "planted" their seed in the dirt.


I wonder what will happen next?
Well......
My fantastic aide, cut leaves with the smallest oval cutter out of green paper. Again, 2 per seed. She made the sprouts and the vine. The kiddos came in the next day and found that their seeds had grown into small plants!! The kiddos were very excited. I was excited because the word "vine" was being used spontaneously by most of the kiddos! Yay!!!


That afternoon, we reviewed the sequence of the pumpkin life cycle again. So we have made the seeds and the sprouts. What is next? Pumpkin flowers! I must admit I struggled with this one. How to make the flower and have it look realish. I finally found a start pattern in a scholastic pattern book. I printed this on cardstock and cut it out (well my fantastic aide did that part). After much discussion of the sprout growing into a flower, the kiddos glued yellow tissue paper on the stars. The kiddos crumbled the paper and glued that on. I wanted it to have a "puffy" look to it. Personally, I think the flowers look great!
I don't feel I can post the pattern I used because it came from a book, however, I did find one online that looks similar. Find the link here to my pinterest page.


So now we have the seed, the vine and the flower. Hmmmm....I wonder what the flowers will change into tomorrow? The kiddos had much debate about this.
Fast forward to tomorrow.
Reviewing the vocab again and practicing the sequencing. We discussed the parts of the cycle we have already made. What is next? The small green pumpkin! Yup, you guessed it, we made small green pumpkins. I had out big paper plates and small paper plates. Which plates would make good small green pumpkins? The big ones or the small ones (and yes some said we should use the big plates. Still working on the concept!) So after each kiddo finally made the correct choice of the small plate, we painted the plates green. I focused on the language target "painting with a paintbrush." This concept is tough for my kiddos. So we practice it often.
This is also a great opportunity to discuss how to make the color green. I did not do that today, but it could easily be added in.

After the pumpkins have dried and the kiddos left for the day, I hung the green pumpkins right over the flowers. I did this to show the kiddos that the flower turned into the green pumpkin.
Oh boy were they excited in the morning!! Lots of "Sloan, Sloan, look! Green Pumpkins!" I love that spontaneous language. It warms my heart.
So the last step to this wonderful pumpkin patch is to make the orange pumpkin. We reviewed the sequence of the pumpkin life cycle again and talked about what was last. I also set out the small and big paper plates again to see if they could get it today. Most of the did, yay!
I added pumpkin spice to the paint. Of course, each kiddo wanted to smell the spice. 'What will you smell with?' I asked. "I will smell with my nose." Then it was on to the painting. I used brown construction paper for the stem. Again, I focused on "painting with a paintbrush." Practice makes perfect, right?

Then again, I hung the orange pumpkins right over the green pumpkins. We finished this lesson on the Friday before Halloween. So of course on Monday we went to the "pumpkin patch." I had set out 2 real pumpkins, a big one and a small one. We talked about which pumpkin would make the best jack-o-lantern and why. We of course picked the big one!
First we looked at the pumpkin and talked about what we saw with our eyes. Then we felt it and discussed it some more. I made a pumpkin chart with all of the adjectives.

Next, I carved the top off and we talked about the inside of the pumpkin. What do we see, feel, smell, etc. Great adjectives come from this lesson! I also talked about the flesh and that we can eat it. The kiddos were good and grossed out. I think our jack-o-lantern looked pretty good :)
** Sorry, I forgot to take pictures of the finished product!
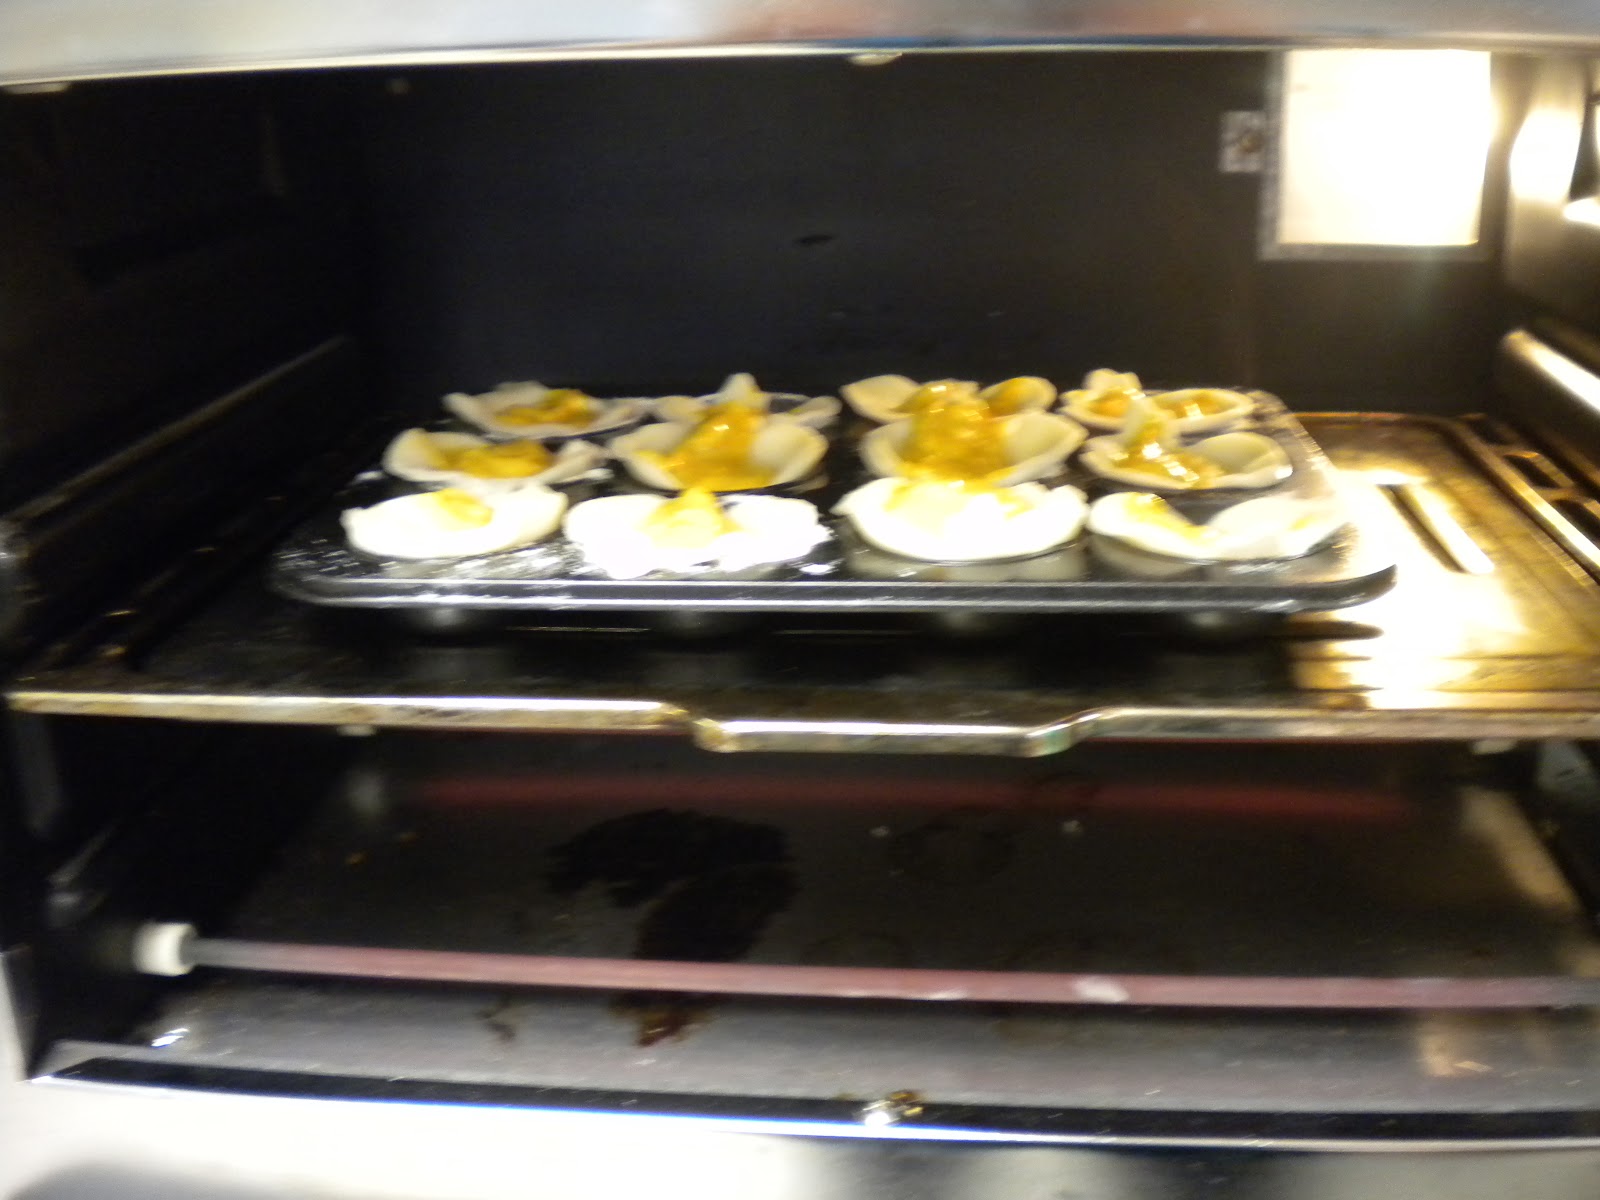
To finish up the pumpkin unit, we made mini pumpkin pies. The kiddos were struggling with this vocabulary word. I am happy to say after this great lesson, they have it now!! These pumpkin pies were super easy to make and only needed to bake for about 12 minutes. Perfect for school! I found the recipe on pinterest. Here is the link to my page. I don't like pumpkin pie, but I liked these :)
Well that sums up my pumpkin unit! It was fun and I think the kiddos learned some new concepts this time around. What do you do for pumpkins?
No comments:
Post a Comment