Wednesday, December 12, 2012

The Gingerbread Man

Run, Run as fast as you can! You can't catch me I'm the gingerbread man!

This is another of my favorite stories. My daughters and I still pretend to be the gingerbread man whenever we run (They are 5 and 3 so this is still fun. I might cry the day this stops being fun). I usually teach this story after Thanksgiving and before the Christmas unit. It is a good unit for between Thanksgiving and Christmas and I feel every child should know this story!

The vocabulary focus for this unit was verbs, verbs, verbs. I did have some nouns, but I really focused on the action words from the story. Here is my list:
old woman, old man, boy, gingerbread man, farmers, bear, wolf, fox, gingerbread house, cookie cutters, eat, bake, decorate, run, stir, roll, rest, and shout.

Here is the link to the vocab I used. It is on Google Drive. It does not have the characters, sorry.

Cookie cutter, bake, decorate and rest turned out to be the most difficult for my kiddos.

To kick of the unit, I hid the characters in pockets. Each kiddo pulled out a character and named it. Then we talked about (well tried to talk about) what story it could be. The gingerbread man kind of gave it away! Then we read the story and I set out the characters as they appeared in the story. I read the story twice this day. To make my puppets, I simply scanned the pages from the book. I really wanted the characters to look the same. I did use an old man and old woman from previous made set because there weren't any good pics in the book of the old man and old woman.


The next day the kiddos acted out the story! What fun! Everyone got a turn to be the gingerbread man and the fox. Now, in the version I read, the gingerbread man does not cross a river. 

The kiddos and I made gingerbread playdough. This is your basic playdough recipe with cinnamon, nutmeg and cloves added for scent and coloring. I'm sorry, I didn't measure just had fun shaking the ingredients in the bowl! The kiddos love to shake :) **Note you will  not need any food coloring for this recipe. 

The basic playdough recipe is 


1 cup flour                                        1 cup water
2 tsp. cream of tartar                         2 Tbsp. cooking oil
1/2 cup salt                                      food coloring
In heavy saucepan, mix dry ingredients.  Add water, oil and food coloring.  Cook 3 min. or until mixture pulls away from side of pan.  Knead slightly in hands when cool.  Put in a ziplock bag.

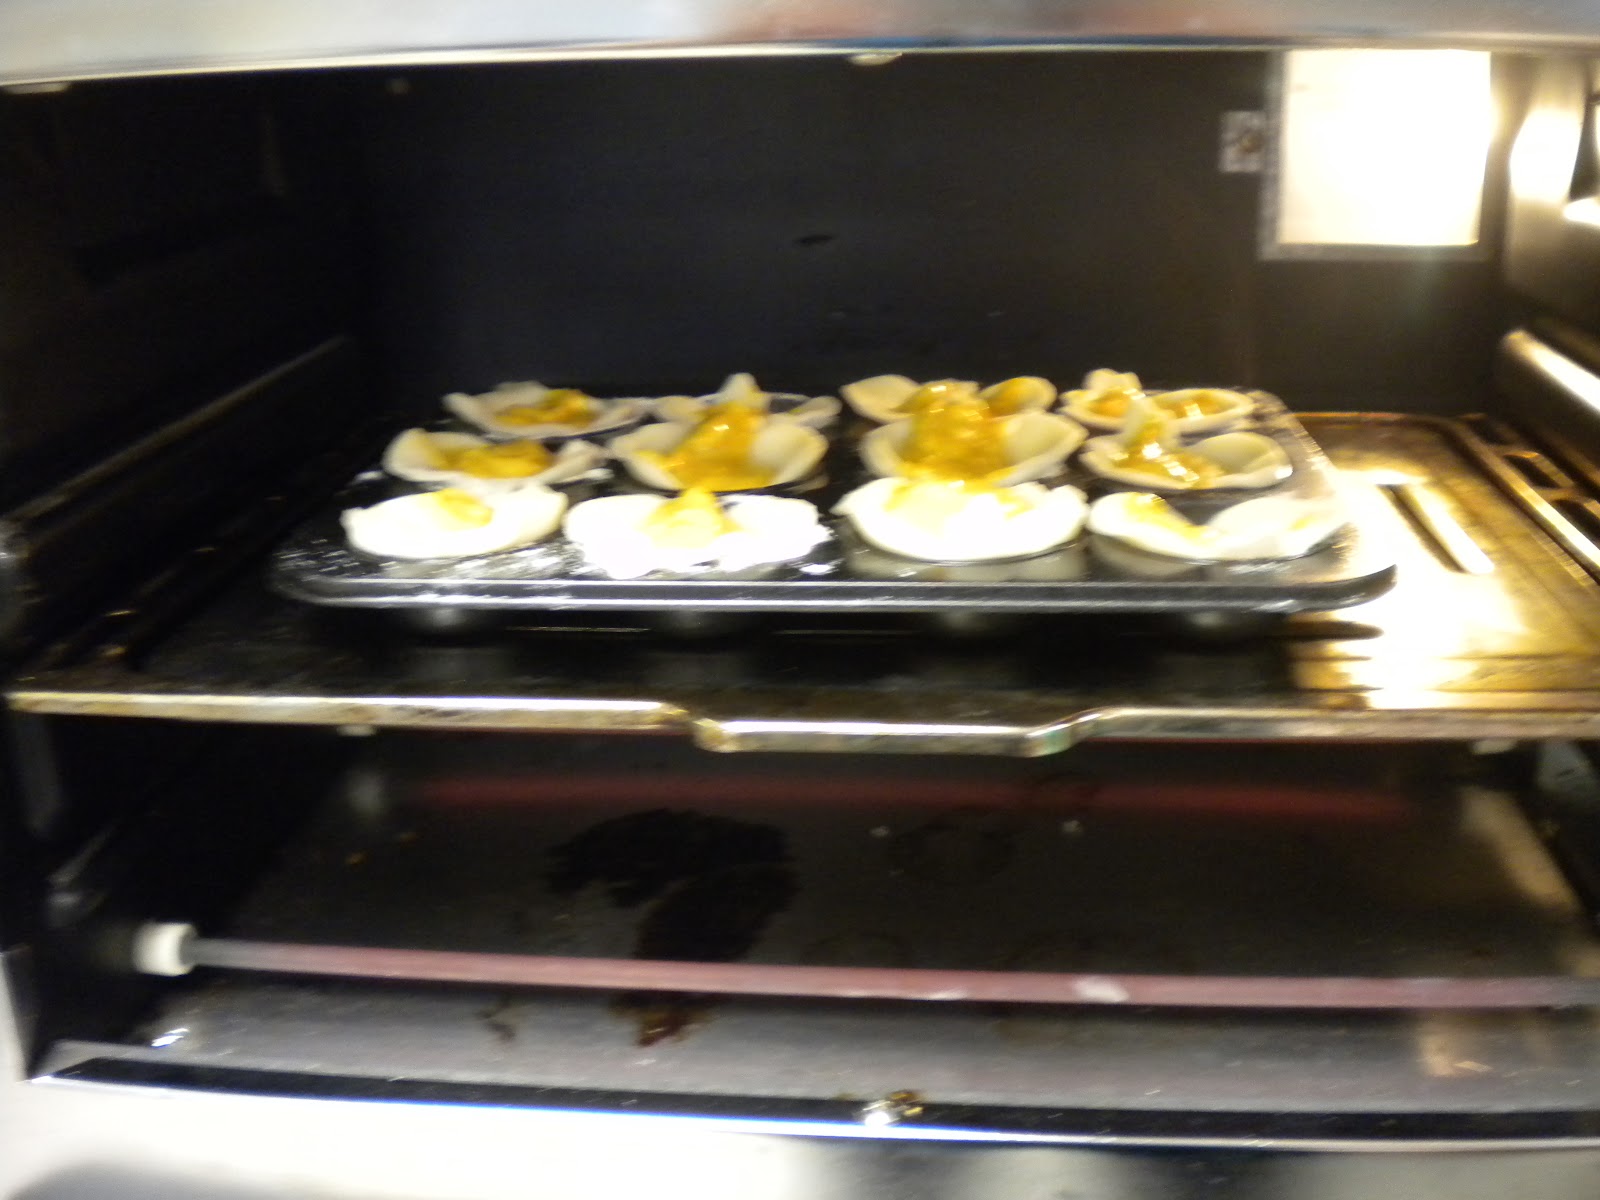
My favorite part of this lesson is of course making gingerbread man cookies!! This lesson I really focused on the verbs. Stir, roll, cut, bake, run away, decorate. In the morning we made the cookies. Then those naughty cookies ran away!! In each location the cookies left us a clue as to where to run next.
We used a bag recipe. Betty Crocker makes a good bag mix.
**Note: if you plan on rolling out the cookies to make gingerbread men, chill the dough for at least 20 minutes. It will roll so much nicer. Trust me. I always forget.


Here is an example of one of my clues:

Run, run as fast as you can you can't catch me I'm the gingerbread man! I ran to the teacher you see on Tuesdays and Thursdays. (this was their speech teacher.)

I had about 5 clues. We finally found the naughty cookies in the audiology room in the sound booth. I forgot to take pictures sorry!!

The next day we acted out the story again. Each kiddo pretending to be a different character. Then for the big grand finale, we went into another class and acted the story out for them! What fun. Again, I forgot to take pictures. Sorry, I was to busy being the narrator.

The characters in the version I read wear clothes and don't look anything like the real animals. So one day we sorted bears, wolves, foxes and cookies. I set out the character puppets and had  stack of pictures. Each kiddo took turns drawing a card and telling me what it was.
T: What is it?
S: It is a bear.

The language focus here was It.

Here is the link to the pictures I used. Let me know if there are any issues accessing the link. It is on Google Drive.

For our last big lesson we read "Gingerbread Baby" and focused on the house. All of my students wanted to call it a gingerbread man house! We really focused on just the gingerbread house. So of course we made gingerbread houses! In the next post, I will outline how we made these super easy, non-edible houses. I also remembered to take a ton of pictures!


Monday, November 26, 2012

Little Red Hen

I see I have fallen behind once again. Grrrr....one day I will get organized, I promise. Maybe next semester when I have a student teacher...

So this past week we focused on the Little Red Hen. I love this story,  mostly because I get to bake bread at the end of the unit :)


The main focus of this unit was the retelling of the story. I wanted the kiddos to learn the language in the story, "who will help?" "Not I!"

To kick off the unit, I put the pictures from the story in my large pockets (it so much more exciting to hide stuff in pockets than to just hand it to the kiddos! I can't tell you how much I use those simple pockets!!) Each kiddo pulled out a picture from the story and we brainstormed what it could be from. My story had a hen, a cat, a dog and a goose. We called it a duck though. Each of these picture had magnets attached to the back. I put the pictures on the side of my desk for the kiddos to retell the story. The kiddos had fun retelling the story to each other. I LOVED hearing the words from the story!


I found my printables from sparkelbox, the link can be found here.

Kizclub.com has some great pictures, the link can be found here. The pictures can be printed in either black or white. 

After reading through the story a few times, I had the kiddos act it out. Each kiddo was given a mask to pretend to be a character from the story. I was the storyteller and the kiddos just needed to say the famous lines! They had such fun. The mask were printed from sparklebox at the above link.  I also gave each kiddo a mask to make and take home with the hopes of each kiddo acting out the story at home!

Then everyone made a red hen puppet, as you can see, not all the hens were red!


Of course, last but not least was baking bread! This is my favorite day. I love bread, mmmm...with lots of butter! I have a no yeast, no knead recipe that works pretty well with the kiddos. We did knead the dough a bit, just because the little red hen did! The link to the recipe can be found here. I will say, we added 1 tsp. of salt to the recipe and it made a big difference. It needs to bake for 40 mins so plan accordingly.

Mmmmm...everyone ate it too!! Love the smell of bread baking. 

Wednesday, November 7, 2012

Pumpkins, Pumpkins, Pumpkins!

I know this post is a bit late, but we finished up last week. I had a great time teaching this unit to the kiddos. The main focus of this unit was the life cycle of the pumpkin. I taught this last year (I have the same group again), so this year I wanted to extend it to include new vocabulary.

Vocabulary Focus
seed, sprout, plant, vine, pumpkin flower, green pumpkin, orange pumpkin, pumpkin patch, jack-o-lantern, and pumpkin pie.
I also focused on the idea of each item "growing" or "changing" into the next stage of the cycle.

For this unit each day we made a stage of the pumpkin life cycle.

Day One
I hung "dirt" on the board. This was brown paper :) I read aloud a pumpkin story. There are so many good ones out there. I picked "It's Pumpkin Time" by Zoe Hall to read to my kiddos. After reading the story, I introduced the vocabulary words/cards and the kiddos put the cards in the correct order. We talked about what comes first. The seed! So of course we made seeds!!

I cut ovals from the largest creative memory oval cutter using the blue blade. This gave me the biggest oval possible. I cut 2 per student. Then I used the hole punch and punched holes around the pair. Last, tying a brown string on the first hole so the kiddos could practice their lacing skills. After the kiddos laced, they crumbled 2 pieces of scrap paper to stuff the seeds. The last thing to do is to plant the seeds of course!! Each kiddo came up and "planted" their seed in the dirt.


I wonder what will happen next?
Well......
My fantastic aide, cut leaves with the smallest oval cutter out of green paper. Again, 2 per seed. She made the sprouts and the vine. The kiddos came in the next day and found that their seeds had grown into small plants!! The kiddos were very excited. I was excited because the word "vine" was being used spontaneously by most of the kiddos! Yay!!!


That afternoon, we reviewed the sequence of the pumpkin life cycle again. So we have made the seeds and the sprouts. What is next? Pumpkin flowers! I must admit I struggled with this one. How to make the flower and have it look realish. I finally found a start pattern in a scholastic pattern book. I printed this on cardstock and cut it out (well my fantastic aide did that part). After much discussion of the sprout growing into a flower, the kiddos glued yellow tissue paper on the stars. The kiddos crumbled the paper and glued that on. I wanted it to have a "puffy" look to it. Personally, I think the flowers look great!
I don't feel I can post the pattern I used because it came from a book, however, I did find one online that looks similar. Find the link here to my pinterest page.


So now we have the seed, the vine and the flower. Hmmmm....I wonder what the flowers will change into tomorrow? The kiddos had much debate about this.

Fast forward to tomorrow.
Reviewing the vocab again and practicing the sequencing. We discussed the parts of the cycle we have already made. What is next? The small green pumpkin! Yup, you guessed it, we made small green pumpkins. I had out big paper plates and small paper plates. Which plates would make good small green pumpkins? The big ones or the small ones (and yes some said we should use the big plates. Still working on the concept!) So after each kiddo finally made the correct choice of the small plate, we painted the plates green. I focused on the language target "painting with a paintbrush." This concept is tough for my kiddos. So we practice it often.

This is also a great opportunity to discuss how to make the color green. I did not do that today, but it could easily be added in.


After the pumpkins have dried and the kiddos left for the day, I  hung the green pumpkins right over the flowers. I did this to show the kiddos that the flower turned into the green pumpkin.

Oh boy were they excited in the morning!! Lots of "Sloan, Sloan, look! Green Pumpkins!" I love that spontaneous language. It warms my  heart.

So the last step to this wonderful pumpkin patch is to make the orange pumpkin. We reviewed the sequence of the pumpkin life cycle again and talked about what was last. I also set out the small and big paper plates again to see if they could get it today. Most of the did, yay!

I added pumpkin spice to the paint. Of course, each kiddo wanted to smell the spice. 'What will you smell with?' I asked. "I will smell with my nose." Then it was on to the painting. I used brown construction paper for the stem. Again, I focused on "painting with a paintbrush." Practice makes perfect, right?


Then again, I hung the orange pumpkins right over the green pumpkins. We finished this lesson on the Friday before Halloween. So of course on Monday we went to the "pumpkin patch." I had set out 2 real pumpkins, a big one and a small one. We talked about which pumpkin would make the best jack-o-lantern and why. We of course picked the big one!

First we looked at the pumpkin and talked about what we saw with our eyes. Then we felt it and discussed it some more. I made a pumpkin chart with all of the adjectives.


Next, I carved the top off and we talked about the inside of the pumpkin. What do we see, feel, smell, etc. Great adjectives come from this lesson! I also talked about the flesh and that we can eat it. The kiddos were good and grossed out. I think our jack-o-lantern looked pretty good :)

** Sorry, I forgot to take pictures of the finished product!

To finish up the pumpkin unit, we made mini pumpkin pies. The kiddos were struggling with this vocabulary word. I am happy to say after this great lesson, they have it now!! These pumpkin pies were super easy to make and only needed to bake for about 12 minutes. Perfect for school! I found the recipe on pinterest. Here is the link to my page. I don't like pumpkin pie, but I liked these :)


Well that sums up my pumpkin unit! It was fun and I think the kiddos learned some new concepts this time around. What do you do for pumpkins?

Tuesday, November 6, 2012

Great Idea!

I found this great idea on pinterest and wanted to share it!

Do your kiddos use tons of soap or hand sanitizer? Mine do, at school and at home. So, I tried this on my kiddos at home first and it worked! Simply wrap a rubber band around the top part of the pump. This will help control the amount of soap or sanitizer that comes out, preventing the big glop of a mess that most students make!

Why didn't I think of this? And what did I do before pinterest????

Here is the link to my pinterst page

Pinned Image

Saturday, October 20, 2012

Acorns

So today the focus was on hide and hid. I have a paper squirrel and some acorns. I gave the squirrel and an acorn to a kiddo. Their job was to hide the acorn somewhere in the room (we did watch, that way we could answer the question).

Then I asked another kiddo "Where did Yousef  hide the squirrel?"

"Yousef hid the squirrel _________." Then it was their turn to hide a squirrel.
The past tense version needed lots of modeling.  The kiddos kept saying "hide" instead of "hid."

I must admit this lesson was hilarious!! The kids were laughing and having a wonderful time, way more than I thought they would!! My favorite was when E'Mani put the acorn in the oven, closed the door and turned the knobs to turn the oven on. Then Andrew went over turned the "oven off" and opened the door. "oh, its hot!" he said. What great spontaneous language!!

**Sorry no pictures from the lessons.

For math that day, we "gathered" nuts. I spread out the acorns and called one kiddo to "gather" acorns. I counted to 5 and let each kiddo gather as many acorns as they could. We counted the acorns and made a chart to see who gathered the most.

Friday, October 19, 2012

Fall is here!

I must say this school year is going to be busy! I am out of my room co-teaching for half the day. Then rush back to eat lunch and hit the ground running again! I promise to try and be better about posting, it might not be everyday this year. 

Well fall has finally hit this year in Michigan. It is my favorite time of year. I love the smell of the cool air, the crunch of the leaves under foot, apples, pumpkins, donuts and cider! So this past week I introduced the fall unit to my preschoolers. 

The vocabulary words for this unit are: Fall, tree trunk, branch, rake, raking, leaves, scarecrow, squirrel, acorn, apples, leaf pile, pumpkin, basket, red, orange, yellow and brown. 

The language targets for the unit are: -ing verbs (change, turn, rake, fall, gather), pronouns (he/she, his/her), past tense verbs (find/found, hide/hid) and prepositions (on, under, next to, in front, behind, in). 

To kick off the fall unit we took a fall nature walk. I gave each kiddo a clip board and a nature checklist. I found it on pinterest. Here is the link to the prekinders website where I found the checklist. I changed the ant to a tree trunk as that was one of our vocabulary words. The kiddos had so much fun running around and coloring their checklist. When we finished the checklist, we of course collected leaves to be sorted when we got inside. 

For Math we sorted the leaves. We started with size; small, medium and big. Then moved onto colors. We counted and made tallies. 


For centers I had out coffee filters to make trees. The kiddos colored with washable markers then sprayed with water. What fun! After the trees dried, I glued the trunk on. 

For the afternoon center the kiddos painted the back of leaves and stamped with the leaves. I found this on pinterest. I don't have the link sorry. But here are the pictures from my classroom. 


Friday, September 21, 2012

Welcome Back!

What a wonderful and crazy start to the school year.  I think it is this way every year! I can't believe 14 days have passed already. Sorry, I haven't posted in awhile. Life has been very crazy in preschool land. Moving classrooms, sharing a classroom and an aide! Ahhh!! Finally getting settled into my routine (that is what I keep telling myself anyway.)

Well I had tons of fun on pinterest this summer finding new things for my classroom! The first week we made a version of time capsules that I found at pinterest. I made sheets for the kiddos to use. Each kiddo wrote their name, age and told a few things about themselves. Then each one drew a self portrait. Last, I measured each kiddo with string and put it in an envelope. I marked the envelope "__________ height on (date)." I put all the papers in a folder and stapled it shut. I marked "Do not open till June 2013!" and let the kiddos decorate it.  I don't have a picture, sorry. Will update when I get a chance to upload the pages I created. The big plan is to do the same activity in June! Here's hoping I remember (I hung the folders on my board in plain sight so hopefully this will help).
The link to my pinterest board for this activity can be found here

We also made "All About Me" bags. The kiddos colored the people and glued the finished people on a lunch bag. Each kiddo took theirs  home to fill with a few important items to share with the class. I found this on pinterest as well :) The link to the website can be found here

Well that is just a few of the fun things we did to kick off the year! I will start up the language lessons for the year with the next unit we do, which will be APPLES! I so love fall and can't wait to start this one!!

Sunday, July 1, 2012

Well summer is finally here! I will return in the fall with more themes and ideas. I will try to post a few of the fun, crazy things I do with my own kiddos during the summer. Enjoy your summer time!

Monday, June 11, 2012

preposition: review of "inside"

Who is inside the sleeping bag?

To review the preposition "inside" we used the sleeping bag today.

Language Goals
Expressive Language: preposition "inside" conjunction "and"
Receptive Language: Who/What questions

To start everyone made a large circle on the carpet area. I selected one student to go in the hall with my aide. Then I put one student inside the sleeping bag, all the way! Nothing can be showing. Call the student in the hall back in the classroom to try to guess who is inside the sleeping bag.

T: Who is inside the sleeping bag?
S: Hamoody is inside the sleeping bag!
(the student who was inside the sleeping bag now goes in the hallway.)
Once everyone has had a turn inside the sleeping bag, I hid camping items inside the sleeping bag. Sometimes I hid one item or sometimes I hid two items (hoping to get the "and" conjunction!)

T: What is inside the sleeping bag?
S: The tent and the pots are inside the sleeping bag.

CENTERS
Sleeping bags-the kiddos made sleeping bags from construction paper and yarn. I cut large strips of white construction paper and folded the bottom up about 3//4 of the way to the top.  Then I punched holes along the edges and tied a string for the kiddos to lace. Once the kiddos laced the sleeping bag, they got to decorate it however they wanted. I also took pictures of the kiddos laying down on the ground and let them cut out the pictures to put inside the  sleeping bag. Super cute!

here is the finished product minus the picture of the kiddos.


Tuesday, June 5, 2012

preposition: inside

Tent Day!

I love camping so much and I am super excited to share this experience with my kiddos at school!
Today was tent day. I brought  a small tent (borrowed from my kiddos at home) and we pitched a tent. I don't think my kiddos at school have every paid so close attention to what I was doing! They were all intrigued.

Language Goals
Expressive Language: inside, and (review pronouns I, he/she)
Receptive Language: Where and Who questions

Once the tent has been pitched, take turns going inside the tent.
T: Andrew, go inside the tent. Where are you?
S: I am inside the tent!
T: (ask another student) Where is Andrew?
S: He is inside the tent.

Give each child a chance to be in the tent alone. Then call on 2 or more students to go inside the tent.
T: Yousef and Symone go inside the tent. Where are you?
S: Yousef and I are inside the tent (Or We are inside the tent)

Then put everyone inside the tent!


CENTERS
Make a tent-I searched all over the Internet for a tent craft and everything was so detailed that the kiddos wouldn't get to do much. So, I created my own. Using 5 toothpicks, clay, paper, crayons/markers and hot glue gun (adult use) we made a tent. Roll the clay into 6 small balls. Stick the toothpicks in the clay to form the tent shape.

Then give each child a precut rectangle to decorate. This will be the "tent" top. The adult will hot glue the tent top on the toothpicks. We set the tent on dark green construction paper rectangle.


Wash mess kit- at the water table, the kiddos washed the mess kits. I brought in  some washcloths and filled the tub with soap and water. What a messy fun time they had, but hey my floors got clean!

Tent play- I left the tent from the morning set up and let the kiddos play inside. I added a sleeping bag, flashlight and cooler for a fun dramatic play center.

Writing Center-The kiddos cut and glued a tent shape onto green paper. Then they wrote "I am inside the tent" on the paper. Some kiddos traced and some wrote on their  own. Then the kiddos glued pictures I had taken early inside the tent (each kiddo laid on the ground with head in hands for the pictures. Super cute!)

future tense: I will

Camping!

We started our finally unit of the school year!! Hard to believe so much time has passed already. For the final unit, we are going camping! To start the unit off we reviewed camp vocabulary words and watched a video through Discovery Streaming. Your school needs to be a member to access the videos. If your school has a membership here is the link to the video we watched.

The next day, I brought in some camping items from home (a tent, sleeping bag, backpack, mess kit, cooler, and flashlight.) I set these out and some non-camping items. The kiddos had to decided what to bring on the camping trip!

Language Goals
Expressive language: Future tense (I will bring)
Receptive Language: What questions

Name and review all of the items to start.
Teacher should model the first item.
T: I will bring the tent camping. Who will bring the tent?
S: Sloan will bring the tent!
Let each child pick an item to bring. We sang a song after each item.
"I will bring the tent, I will bring the tent, heigh-ho off we go, I will bring the tent." (sung to Farmer and the Dell).
Here are the vocabulary pictures I used for this unit. 


CENTERS
Writing Center- I had a writing prompt made for the kids "I will bring the ______________." I set our the vocabulary pictures and the kiddos had to pick one item to bring. They wrote the word on the line (with the help of the classroom para) and drew a picture to match. 

Thursday, May 31, 2012

Verb drink

Milk tasting! Yum. We first talked about where milk comes from. We looked at pictures in a book and talked about milking cows. Then on to tasting. We tasted white milk, chocolate milk and strawberry milk.

Language Goals
Expressive language: verb drink (will drink, drinking, drank), he/she pronoun review and spontaneous language
Receptive Language: Who questions

To make each kind of milk, I had the students give me the directions and I did EXACTLY what they told me to do!! What fun. If they told me to turn the milk, I turned the whole jug!! At one point, one of the students said "Just open!" What a great use of the word "just!

After each kind of milk was made everyone drank the milk.
T: Who drank the white milk?
S: Everyone drank the white milk.
Can do each student individually
T: Andrew, what did Hamoody drink?
S: He drank the white milk.


Make a chart, have the students come up after each milk and write if they liked it or didn't like it.


We made rainbow milk in the afternoon. We discussed what we thought would happen once we added the food coloring to the milk. Will the color stay together, spread out or get smaller? Nothing really happened! Now, what will happen if I did my cotton swab in dish soap? Will the color stay together, spread out or get smaller??? Watch the fun happen! I did on first to demonstrate for the students. Then I gave each student their own plate of milk. I found this activity on Pinterest. Step by step directions can be found here The milk MUST be 2% or higher. You only need a small drop of dish soap. If you dip the cotton swab again in the soap, it will spread again.